How to Make a Sourdough Starter: The Ultimate Beginner's Roadmap
Every loaf of naturally leavened bread begins the same way: flour, water, and patience. If you want to make sourdough starter that reliably rises bread, you're cultivating a living colony of wild yeast and bacteria — not following a recipe so much as running a small, controllable fermentation experiment on your kitchen counter. This comprehensive guide walks through the exact process, day by day, with the troubleshooting details most tutorials skip, ensuring you successfully make your own sourdough starter from scratch.
- Quick Summary: Key Steps to Your First Sourdough Starter
- Understanding Sourdough Starter: What It Is and How It Works
- Essential Tools and Ingredients to Make Sourdough Starter
- Day-by-Day Feeding Schedule to Build an Active Starter
- How to Tell When Your Starter Is Ready to Bake With
- Troubleshooting Common Problems When You Make Sourdough Starter
- Next Steps: Moving From Starter to Your First Loaf
- Frequently Asked Questions About Making Sourdough Starter
Quick Summary: Key Steps to Your First Sourdough Starter
- A sourdough starter typically becomes bake-ready in 5 to 10 days, though cooler kitchens or whole-grain flour can extend this to two weeks.
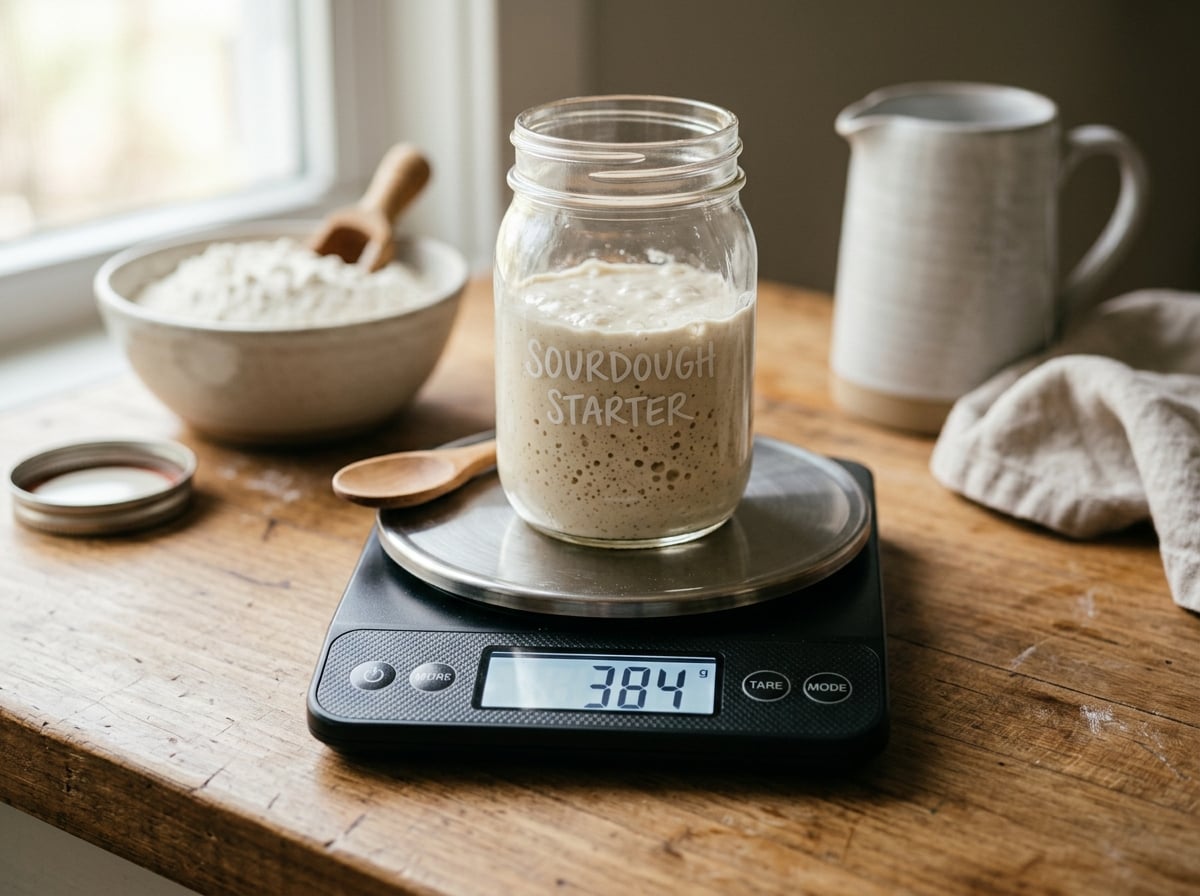
- The core ratio for feeding is 1:1:1 (starter:flour:water by weight) — consistency in ratios matters more than exact brand or flour type.
- A starter is ready to bake with when it doubles in size within 4–8 hours of feeding and passes the float test.
- Hooch (a layer of liquid) signals hunger, not failure; pink, orange, or fuzzy mold means the batch must be discarded and restarted.
Understanding Sourdough Starter: What It Is and How It Works
To make sourdough starter, you're essentially creating a fermented mixture of flour and water that captures wild yeast and lactic acid bacteria naturally present on grain and in the air. These microorganisms feed on the starches and sugars in flour, producing carbon dioxide (which leavens bread) and organic acids (which create sourdough's characteristic tang).
Unlike commercial yeast, which is a single cultivated strain, a starter is a small ecosystem. Wild yeast strains such as Saccharomyces exiguus coexist with lactobacilli bacteria in a symbiotic relationship — the bacteria lower the pH, creating an environment hostile to pathogens but ideal for the yeast to thrive. This is why a mature starter smells sour, slightly alcoholic, or even a little cheesy, rather than smelling "off." Understanding this microbial relationship explains almost every behavior you'll see over the next two weeks, from bubbling patterns to smell changes to why feeding schedules matter more than any single ingredient brand.
The practical implication: you're not "making" yeast appear from nothing. You're creating favorable conditions for organisms that already exist on the flour and in your environment to multiply and dominate the culture. That's why starters made in different kitchens — even with identical flour — develop distinct flavor profiles over time. For more general information, refer to "Sourdough Starter: The Complete Guide to Understanding and Using It."
Essential Tools and Ingredients to Make Sourdough Starter
You need four things to make sourdough starter successfully: a clean glass jar, a kitchen scale, flour, and non-chlorinated water. Everything else — thermometers, special crocks, proofing boxes — is optional convenience, not necessity.
Flour choice matters more than any other variable. Whole wheat or rye flour contains more wild yeast and bacteria than bleached all-purpose flour, and it will kick-start fermentation faster. Many experienced bakers begin with 100% whole wheat or rye for the first 2–3 days, then transition to a mix of whole wheat and all-purpose (or unbleached all-purpose alone) for ongoing feedings. Bleached flour has been chemically stripped of some of its natural microbial load and nutrients, which can slow early development.
Water quality is the second most common failure point. Heavily chlorinated tap water can suppress the microbial activity you're trying to encourage. If your tap water is chlorinated, let it sit uncovered for an hour to off-gas, or use filtered water instead.
| Item | Recommended Choice | Why It Matters |
|---|---|---|
| Jar | Wide-mouth glass, 16–32 oz | Easy to stir, see activity, and clean |
| Flour (Days 1–3) | Whole wheat or rye | Higher natural yeast/bacteria content |
| Flour (ongoing) | Unbleached all-purpose or bread flour | Stable, predictable fermentation |
| Water | Filtered or dechlorinated | Chlorine inhibits microbial growth |
| Scale | Digital, 1g precision | Weight is far more accurate than volume |
| Cover | Cloth, coffee filter, or loose lid | Allows airflow while keeping pests out |
A digital scale is non-negotiable if you want consistent results. Measuring flour by volume (cups) can vary by up to 20% depending on how it's packed, which throws off the entire feeding ratio and makes troubleshooting nearly impossible.
Day-by-Day Feeding Schedule to Build an Active Starter
Building an active starter takes 5 to 10 days using a consistent 1:1:1 feeding ratio of equal parts starter, flour, and water by weight, maintained at 70–78°F (21–26°C). The schedule below reflects what actually happens in most kitchens, including the deceptive "false rise" that trips up nearly every first-time baker.
Day 1: Combine 50g whole wheat (or rye) flour with 50g water in a clean jar. Stir until no dry flour remains. Cover loosely and place somewhere consistently warm — near 75°F is ideal. Nothing visible may happen today, and that's normal.
Day 2: You may see small bubbles or a slight rise — this is often a false start driven by a burst of initial bacterial activity, not true yeast establishment. Discard half the mixture (this step matters; skipping it dilutes acidity and slows progress) and feed with 50g flour and 50g water. If you're interested in alternative methods, explore how to make sourdough starter with yeast for a potentially faster initial boost, though it deviates from a purely wild yeast approach.
Days 3–4: Activity often decreases here, sometimes alarmingly. This dip happens as bacteria and yeast compete for dominance and is one of the most common reasons beginners give up too early. Continue discarding half and feeding once daily with the same 50g/50g ratio.
Days 5–7: Renewed, more vigorous bubbling typically appears. You should start noticing a rise between feedings and a change in aroma — often described as tangy, yeasty, or faintly like ripe fruit. Move to twice-daily feedings (roughly every 12 hours) if you have the schedule flexibility; this accelerates strengthening.
Days 7–10: The starter should now roughly double in volume within 6–8 hours of feeding. If it does, you've built a viable culture. If it's inconsistent, continue daily feedings for a few more days — grain type, ambient temperature, and water mineral content all affect timeline, and rye-based starters often finish faster than all-purpose ones.
Throughout this process, resist the urge to add extras — sugar, honey, or store-bought yeast — to speed things up. These shortcuts disrupt the natural microbial succession and often produce a weaker, less stable starter long-term. For a deeper look at the fermentation science behind timing variability, King Arthur Baking's starter research offers detailed lab-tested comparisons across flour types.
How to Tell When Your Starter Is Ready to Bake With
A starter is ready to bake with when it reliably doubles in volume within 4–8 hours of feeding, has a domed or bubbly surface, smells pleasantly sour rather than acidic or unpleasant, and passes the float test. Reaching this state consistently — not just once — is what separates a bake-ready starter from one that needs more time.
The float test is simple and diagnostic: drop a small spoonful of active starter into a glass of room-temperature water. If it floats, it's holding enough gas to leaven bread. If it sinks, it needs more time or a stronger feeding schedule. This test isn't perfectly reliable on its own — a starter that sinks can still bake fine bread if it's otherwise active — but it's a useful quick check, especially for beginners still learning to read visual cues.
Look for these three signals together rather than relying on any single one:
- Rise timing: Doubling in 4–8 hours after feeding, not 12+ hours (too slow) or under 2 hours (can indicate over-fermentation between checks).
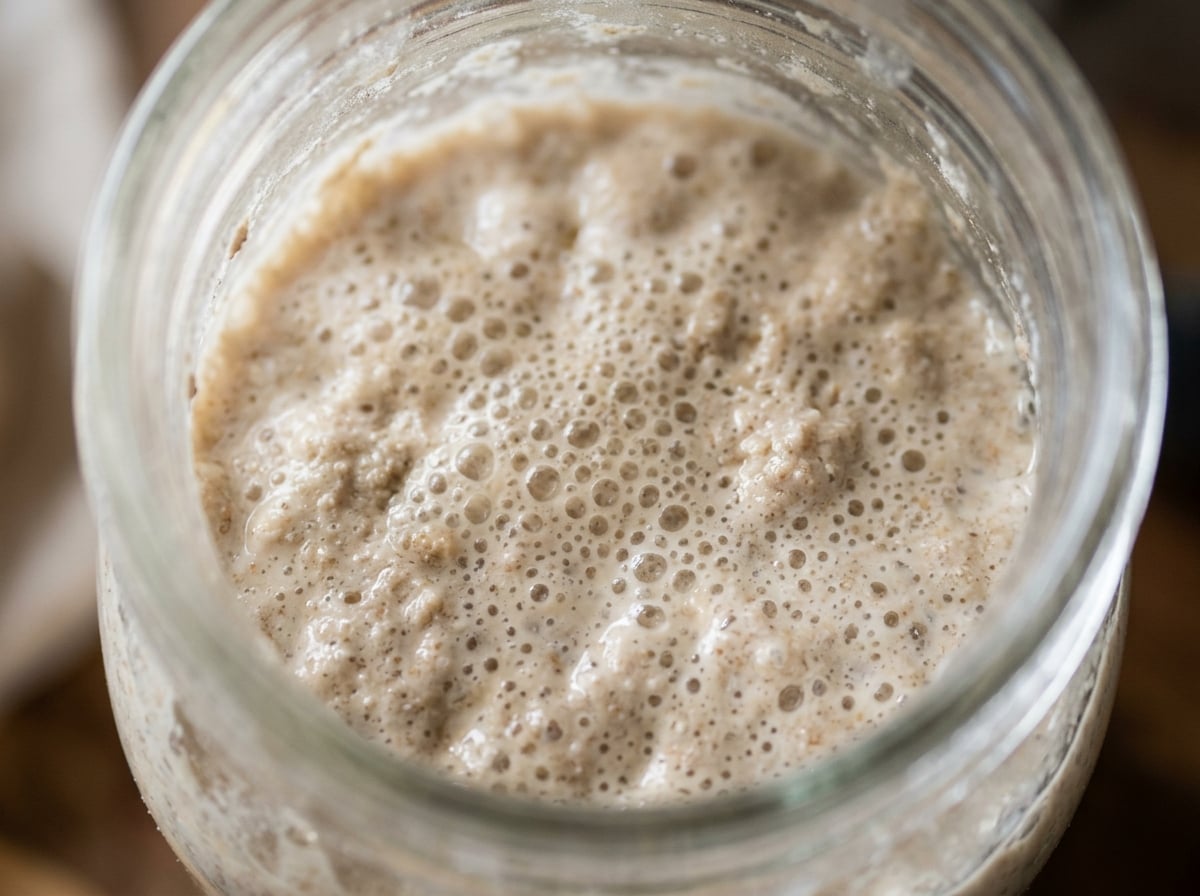
- Texture: A web of bubbles throughout, not just on the surface, indicating the yeast is distributed and active through the whole mass.
- Smell: Tangy, slightly alcoholic, or yogurt-like. A harsh vinegar or acetone smell suggests it's hungry and overdue for feeding, not necessarily unhealthy.
Once your starter hits peak rise consistently across two to three feeding cycles, it's ready for its first bake test.
Troubleshooting Common Problems When You Make Sourdough Starter
Most sourdough starter problems trace back to three causes: inconsistent feeding, temperature swings, or contamination — and each has distinct visual signs that tell you exactly which one you're dealing with. Knowing the difference prevents unnecessary discarding of a perfectly salvageable culture.
No Rise or Weak Activity
If your starter shows minimal bubbling after 5+ days, check your kitchen temperature first — below 65°F dramatically slows fermentation, sometimes to a near standstill. Move the jar to a warmer spot: on top of the refrigerator, inside a turned-off oven with the light on, or near (not on) a heating vent. If temperature isn't the issue, switch to whole wheat or rye flour for a few feedings to reintroduce more microbial diversity.
Hooch (Liquid Layer on Top)
A grayish or brownish liquid pooling on the surface is hooch — a byproduct of yeast fermentation that appears when the starter is hungry and has run out of food. It is not a sign of spoilage. Simply pour it off (or stir it back in for a more sour flavor) and feed immediately. Frequent hooch formation usually means you need to feed more often or increase your flour-to-water ratio slightly.
Mold or Contamination
True mold appears as fuzzy, colored spots — pink, orange, black, or green — and is fundamentally different from the normal grayish hooch layer. Pink or orange discoloration specifically indicates Serratia marcescens or similar bacterial contamination, and any of these signs mean the starter should be discarded entirely and restarted; there's no safe way to "save" a moldy starter by scraping off the affected part. This is rare if you maintain regular feedings and use clean utensils, but it happens most often when starters are neglected in overly warm, humid environments for extended periods.
| Symptom | Likely Cause | Fix |
|---|---|---|
| No bubbles after 5 days | Temperature too low | Move to a warmer spot (70–78°F) |
| Liquid layer on top | Starter is hungry | Pour off, feed sooner/more often |
| Sluggish rise, sour smell | Underfed or overfed | Adjust feeding ratio to 1:1:1 |
| Pink/orange/fuzzy spots | Contamination | Discard completely, restart |
| Rises then collapses fast | Over-fermented, checked too late | Feed on a tighter schedule |
Next Steps: Moving From Starter to Your First Loaf
Once your starter passes the float test and doubles predictably, you're ready to bake — but jumping straight into a complex artisan boule is a common overreach. Start with a simple, forgiving recipe designed specifically for beginners, ideally one with a longer bulk fermentation window that tolerates timing imprecision.
Feed your starter 4–8 hours before you plan to mix dough, so it's at peak activity when incorporated. Reserve a small amount (about 1–2 tablespoons) as your ongoing starter, and feed that separately to maintain your culture for future bakes. If you're not baking within a day or two, store the reserved starter in the refrigerator and feed it weekly — this "maintenance mode" slows fermentation without killing the culture. For a detailed walkthrough on dough hydration and shaping technique once your starter is ready, see this step-by-step guide on how to bake sourdough bread.
Track your results. Note rise times, dough texture, and crumb structure after baking — this feedback loop is how you'll fine-tune your specific starter's rhythm, since every kitchen environment produces slightly different fermentation timing.
Frequently Asked Questions About Making Sourdough Starter
How long does it take to make a sourdough starter from scratch?
Most starters become bake-ready in 5 to 10 days with daily feeding at room temperature. Cooler kitchens, bleached flour, or inconsistent feeding schedules can extend this to two full weeks, so don't discard a slow starter prematurely.
Can I use tap water to make a sourdough starter?
Tap water works fine unless it's heavily chlorinated, which can suppress the wild yeast and bacteria you're trying to cultivate. Let chlorinated water sit uncovered for an hour before use, or switch to filtered water for more consistent results.
Why does my starter smell like nail polish remover?
An acetone-like smell means your starter is hungry and has exhausted its food supply, producing excess ethanol and acetic acid. Feed it immediately and consider increasing feeding frequency or the flour-to-water ratio going forward.
Do I have to discard part of my starter every time I feed it?
Discarding prevents the jar from overflowing and keeps the flour-to-microorganism ratio balanced, which speeds up strengthening during the initial build phase. Once established, you can reduce discard amounts or use it in sourdough discard recipes instead of throwing it away.
Can a sourdough starter go bad permanently?
A starter showing fuzzy, colored mold (pink, orange, black, or green) is contaminated and should be discarded completely rather than salvaged. Short of visible mold, most sluggish or foul-smelling starters can be revived with several consecutive days of consistent feeding.
What flour is best for making a sourdough starter?
Whole wheat or rye flour works best for the first few days because it contains more naturally occurring wild yeast and bacteria than bleached all-purpose flour. Many bakers transition to unbleached all-purpose or bread flour once the culture is established for more predictable, less sour results. To learn more about how to choose or make a sourdough starter, explore other options on our site.
Leave a Reply