The Best Sourdough Starter: How to Choose or Cultivate Your Own
The best sourdough starter is one that consistently performs for your baking needs, adapts to your specific flour and climate, and is reliably active – typically doubling within 4-8 hours of feeding. This could be a homemade starter cultivated from scratch, an heirloom culture passed down through generations, or a high-quality dehydrated commercial strain like Cultures for Health or San Francisco Sourdough. For most home bakers, a starter built from unbleached bread flour or whole wheat, fed at 100% hydration, and matured for at least two to three weeks often outperforms many pre-made options. What truly matters more than pedigree or brand name is consistency, aroma, rise time, and how the starter behaves in your unique kitchen environment.
- What Makes a Sourdough Starter "Best": Key Factors Explained
- Top Store-Bought and Heirloom Starter Options
- Homemade vs. Purchased Starter: Weighing the Pros and Cons
- Signs of a Healthy, High-Performing Sourdough Starter
- How to Test and Troubleshoot a Weak Sourdough Starter
- Recommendations for Your Specific Baking Goals
What Makes a Sourdough Starter "Best": Key Factors Explained
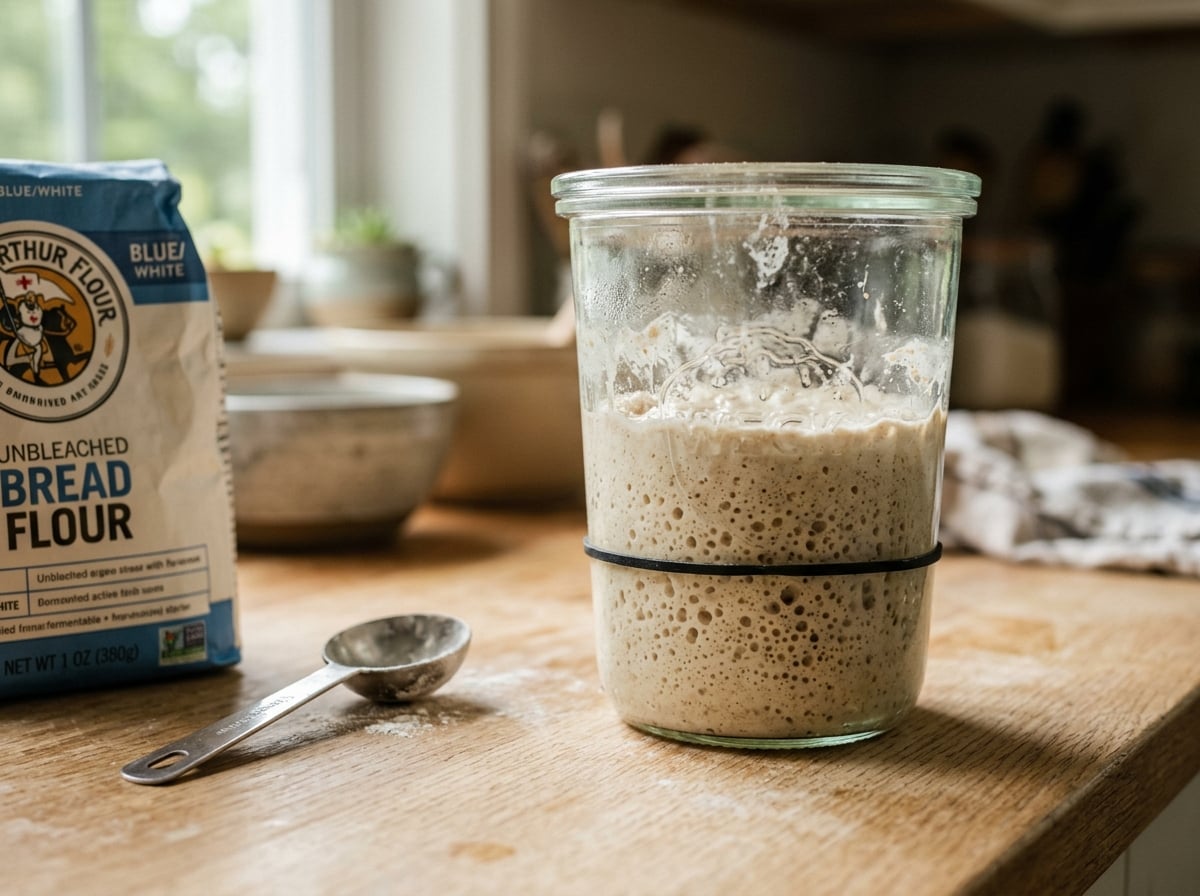
Many bakers often focus on the origin story of a starter — whether it's Grandma's jar from 1952 or one allegedly descended from the Klondike Gold Rush. While charming, the origin story matters far less than three practical variables: the type of flour used, its hydration level, and its age or maturity.
Flour Type
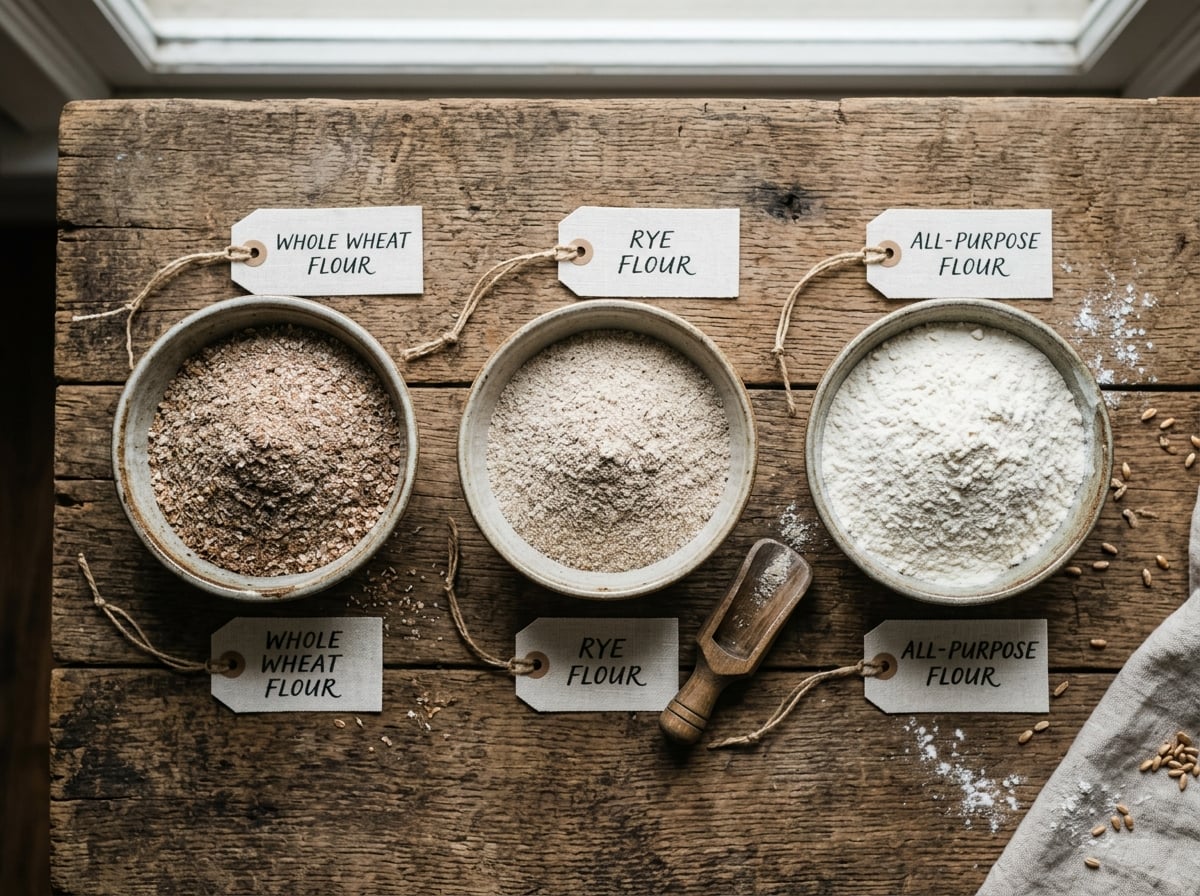
Flour type significantly influences how fast and how vigorously a starter ferments. Whole grain flours, such as whole wheat or rye, contain more wild yeast and beneficial bacteria on their bran. This means they tend to kickstart fermentation faster and often produce a more sour, complex starter. White bread flour, conversely, usually yields a milder, more neutral starter that can be easier to control, especially in enriched doughs like brioche or milk bread. Rye starters, in particular, are renowned for their vigor; many professional bakers maintain a dedicated rye starter because it can often revive a sluggish batch more effectively than other types.
Hydration
Hydration refers to the ratio of water to flour by weight. A 100% hydration starter (meaning equal parts flour and water) is the industry standard and the easiest to monitor visually – you can easily watch its rise and fall in a straight-sided jar. Stiffer starters, typically around 50-65% hydration, are common in Italian lievito madre traditions. These ferment slower, result in less acidic flavors, and are highly prized for enriched breads like panettone. On the other hand, wetter starters (over 100% hydration) ferment more rapidly and tend to produce more lactic acid, contributing a tangier, almost yogurt-like flavor to the final product.
Maturity (Age)
Maturity is arguably the most underestimated variable, especially by beginners. A starter isn't truly "done" at day 7 just because it's bubbling. Those early bubbles are often carbon dioxide produced by a chaotic mix of competing bacteria, not the stable lactobacilli-and-yeast partnership essential for predictable bread rise. Genuine maturity – the kind that leads to consistent oven spring and reliable baking – typically requires 3 to 6 weeks of daily feeding, and sometimes even longer in colder kitchens or when using chlorinated tap water. Understanding the complete process can be found in our guide on how to make a sourdough starter from scratch.
Top Store-Bought and Heirloom Starter Options
If you prefer not to spend a month cultivating a jar of flour paste, purchasing a starter is a perfectly legitimate shortcut. Dehydrated starters are shelf-stable, easy to mail, and typically rehydrate and become active in about 5-7 days. Heirloom starters, usually sold as live liquid cultures, are often ripe and ready faster but require overnight shipping and immediate feeding upon arrival.
| Option | Form | Rehydration/Activation Time | Flavor Profile | Best For |
|---|---|---|---|---|
| Cultures for Health Classic | Dehydrated flakes | 5-7 days | Mild, balanced | Beginners, first-timers |
| San Francisco Sourdough (Sourdoughs International) | Dehydrated | 5-7 days | Tangy, classic SF sour | Bakers chasing pronounced acidity |
| Carl Griffith's 1847 Oregon Trail Starter | Dehydrated (free, pay shipping) | 5-7 days | Mild, historic | Hobbyists, novelty bakers |
| The Fresh Loaf / Local Swaps | Live liquid culture | 1-2 days | Varies widely | Bakers with access to a local source |
| Homemade (flour + water) | Live liquid culture | 2-4 weeks to mature | Depends on flour/region | Anyone wanting full control and satisfaction |
Here are a few important notes to consider before you purchase any starter. Carl Griffith's 1847 Oregon Trail starter is genuinely free (you just cover shipping) and enjoys a loyal following. However, claims of "authenticity" for century-old starters are largely sentimental. The microbial population of any starter adapts and shifts to its immediate environment within weeks, meaning what you bake with today is shaped far more by your kitchen's unique microbiome than by its 1847 Oregon origins. This isn't a critique of the starter itself – it's still a good, reliable choice – but it means you shouldn't pay a premium for lineage alone.
Cultures for Health remains one of the most widely recommended commercial options, largely due to their clear instructions and high success rate among first-time buyers. San Francisco Sourdough starters tend to be noticeably more acidic, thanks to a higher concentration of Lactobacillus sanfranciscensis. This makes it a deliberate choice if you appreciate a pronounced tang in your bread. For a broader understanding of starters, consider our complete guide to sourdough starters.
Homemade vs. Purchased Starter: Weighing the Pros and Cons
This decision point often causes bakers to get stuck, so it's helpful to be direct about the trade-offs instead of suggesting both paths are equally ideal for every situation.
Cost heavily favors homemade. The flour and water required to get a starter going might cost $2-3 total, compared to $12-20 for a dehydrated packet or $15-25 plus overnight shipping for a live heirloom culture. For a comprehensive guide, check out How to Make a Sourdough Starter: The Ultimate Beginner's Roadmap.
Time favors purchased starters, at least in the short term. A dehydrated starter can have you baking in about a week, whereas a starter made from scratch typically requires 3-4 weeks before it's dependable enough to produce a loaf you'd proudly serve to guests.
Reliability is quite a toss-up, especially in the early stages. Homemade starters are more prone to failure in their first two weeks, often due to inconsistent feeding, overly chlorinated water, or a kitchen that's too cold (below 68°F can significantly slow fermentation). Purchased starters, already established microbial cultures, tend to bounce back from mistakes more quickly.
Flavor control favors homemade. When you build a starter using your own choice of flour and your local tap water, it adapts specifically to your unique environment. The wild yeasts already present in your kitchen and flour become an integral part of the culture. This is why two people using the "same" store-bought starter in different cities will likely end up with noticeably different-tasting bread within a few months anyway, as the starter naturally incorporates local yeast populations regardless of its initial origin.
My honest recommendation: If you've previously struggled with making a homemade starter, consider purchasing Cultures for Health or a similar dehydrated option to avoid further frustration. However, if you possess patience and genuine curiosity about the process itself, building one from scratch is incredibly satisfying and costs almost nothing.
Signs of a Healthy, High-Performing Sourdough Starter
A starter that is truly ready to bake with will exhibit a specific, recognizable set of behaviors. If your starter doesn't meet most of these criteria, it likely needs more time to mature or a slight adjustment to its feeding routine.
- Doubles or triples in size within 4-8 hours of feeding when kept at a consistent room temperature (ideally around 70-75°F).
- Domed or bubbly surface with visible air pockets throughout when viewed from the side of the jar.
- Emits a sour, slightly tangy, yeasty smell – reminiscent of ripe yogurt or beer, not chemical odors like paint thinner or nail polish remover.
- Passes the float test: a small spoonful gently dropped into a glass of water should float rather than sinking immediately.
- Displays a consistent rise-and-fall pattern day after day, rather than erratic behavior where it sometimes doubles and other times barely moves.
An acetone (nail polish remover) smell is the most common red flag that causes alarm, but it usually just means your starter is hungry. It has produced excess acetic acid and alcohol byproducts because it has run out of food. One or two feedings on a tighter schedule almost always resolves this. Genuine mold (fuzzy, colored spots – pink, orange, or black) is a different matter and necessitates starting over. Pink or orange discoloration specifically indicates harmful bacteria, and the entire culture should be discarded, including the jar if it's not glass.
How to Test and Troubleshoot a Weak Sourdough Starter
When a starter seems sluggish – showing no rise, a thin and soupy texture, or a flat, uninteresting smell – it's crucial to work through the problem systematically rather than guessing.
- Check the feeding ratio. A 1:1:1 ratio (equal parts starter, flour, water by weight) is standard for maintenance. However, a sluggish starter often responds better to a 1:2:2 or even 1:5:5 ratio, which provides the yeast with more fresh food relative to the existing, depleted starter.
- Check the temperature. Below 70°F, fermentation slows noticeably, and below 65°F, it can almost stall completely. Move the jar to a warmer spot – such as on top of the fridge, inside an oven with just the light on, or near (but not directly on) a radiator.
- Temporarily switch flour. Adding a spoonful of whole wheat or rye flour to an otherwise white-flour starter often reactivates a stalled culture within one or two feedings. This is because the extra nutrients and wild yeast on the bran provide a significant jump start.
- Check your water source. Heavily chlorinated tap water can suppress fermentation. Switch to filtered water, or let tap water sit out uncovered for at least an hour to allow chlorine to dissipate.
- Allow sufficient time before discarding. Many new bakers give up around day 10-14, often just before a starter is about to turn a corner and become active. Unless you observe actual mold, continue feeding daily for at least three weeks before concluding that your starter is truly dead.
If, after three to four weeks of consistent feeding, correct temperature, and flour adjustments, the starter still shows no rise and consistently smells off rather than pleasantly sour, it's reasonable to discard it and begin again. However, this outcome is much rarer than people assume, especially once temperature and feeding ratios are properly controlled.
Recommendations for Your Specific Baking Goals
Different baking goals genuinely call for different types of starters. The misconception that one starter suits every purpose often leads to significant beginner frustration.
- If you're a total beginner, consider purchasing a dehydrated starter like Cultures for Health and follow their rehydration schedule precisely. This approach will have you baking your first loaf within 10 days, allowing you to focus on learning shaping and scoring without simultaneously troubleshooting an unfamiliar homemade culture.
- If you aspire to bake a rustic, tangy artisan loaf with an open crumb and pronounced sour flavor, cultivating a whole wheat starter from scratch or seeking out a San Francisco-style culture is ideal. Allow it to mature for at least four weeks, and consider feeding it on a slightly longer schedule (e.g., every 12 hours instead of every 8) to encourage greater acidity.
- If you are specifically baking rye bread, it's often beneficial to maintain a dedicated rye starter rather than repeatedly converting your all-purpose one. Rye starters ferment more quickly, tolerate cooler temperatures better, and contribute the dense, slightly sour character that rye loaves are known for. Many bakers keep two separate starters permanently for this reason – one white flour starter for everyday sandwich loaves and boules, and one rye starter reserved for darker, denser breads.
- If you frequently bake enriched doughs – such as brioche, panettone, or milk bread – a stiffer starter (around 60-65% hydration), often modeled on Italian lievito madre, will provide more lift and less sourness than a standard liquid starter. This difference is crucial when your yeast is working against the rich inhibitors of butter and sugar.
Ultimately, there is no single "best" sourdough starter that excels in every category. There is only the best sourdough starter for what you are actually trying to bake, fed on a schedule you can realistically maintain. The journey of making and using a starter, even a sourdough starter with yeast, is a rewarding one that begins with learning to understand what a sourdough starter is and these choices.
Leave a Reply