Sourdough Rolls: The Complete Guide to Soft, Fluffy Results
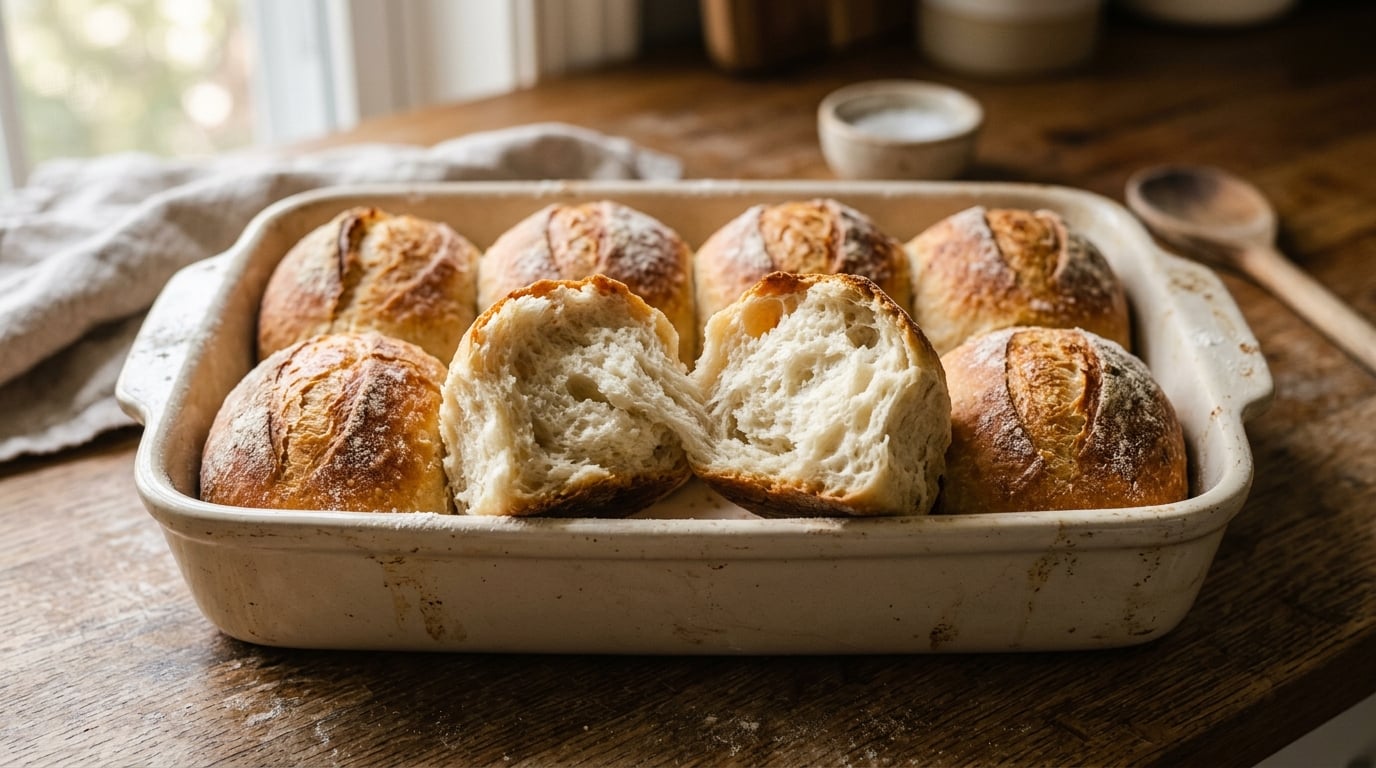
Many home bakers assume that making sourdough bread rolls is just about creating smaller loaves. However, to achieve truly excellent results, you need a different approach. A standout sourdough roll boasts a tender, pillowy crumb, a thin, yielding crust, and a pleasant, mild tang—distinctly different from the assertive sourness often desired in a rustic boule. This guide, based on countless batches made with my own well-maintained starter, will walk you through the precise techniques for hydration, enrichment, and shaping required to master soft, fluffy sourdough rolls.
- What Makes Sourdough Rolls Unique Compared to Sourdough Bread Loaves?
- Essential Ingredients for Soft, Fluffy Sourdough Rolls
- Step-by-Step Recipe: Mixing, Kneading, and Shaping Sourdough Rolls
- Mastering Proofing for a Light, Airy Sourdough Roll Texture
- Baking Tips: Temperature, Timing, and Achieving a Golden Crust
- Common Mistakes to Avoid for Perfect Sourdough Rolls
- Storing and Reheating Sourdough Rolls
- Variations: Garlic Butter, Honey, Whole Wheat, or Discard-Based Rolls
- FAQs About Making Sourdough Rolls at Home
What Makes Sourdough Rolls Unique Compared to Sourdough Bread Loaves?
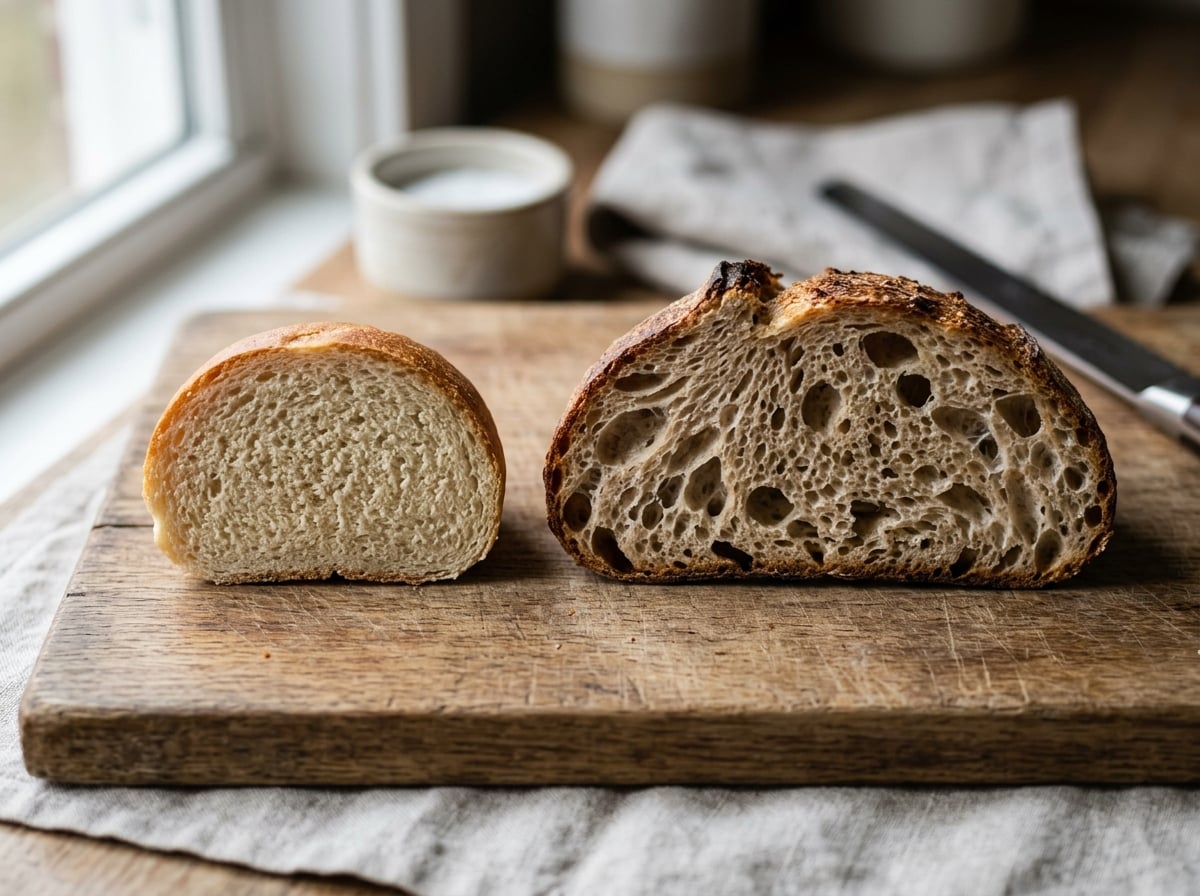
A classic sourdough bread boule is designed for an open, irregular crumb and a thick, chewy crust, which is why bakers often rely on a long cold fermentation and a hot, steamy oven. Sourdough rolls, however, prioritize different qualities.
The dough for rolls is typically enriched with fat, sometimes eggs, and often a touch of sugar or honey. This enrichment serves two key purposes: it gently slows gluten development, resulting in a tender rather than chewy crumb, and it boosts the Maillard reaction during baking, which contributes to that desirable golden, soft-crusted finish instead of a crackly one.
Hydration levels are also critical. While a rustic loaf might feature 75-80% hydration for maximum openness, dough for sourdough rolls usually sits lower, around 60-68%. A wetter dough is challenging to shape into tight, uniform balls and tends to spread rather than rise tall in a pan or on a baking sheet.
Fermentation timing also differs. Because rolls are smaller, they proof more quickly than a two-pound loaf. To achieve a mild flavor rather than pronounced sourness, many bakers (myself included) opt for a shorter bulk ferment and often skip the long cold retard common with artisan loaves. If you prefer tangier rolls, an overnight cold proof is an option, but it's a flavor choice, not a structural necessity for delicious sourdough rolls.
Essential Ingredients for Soft, Fluffy Sourdough Rolls
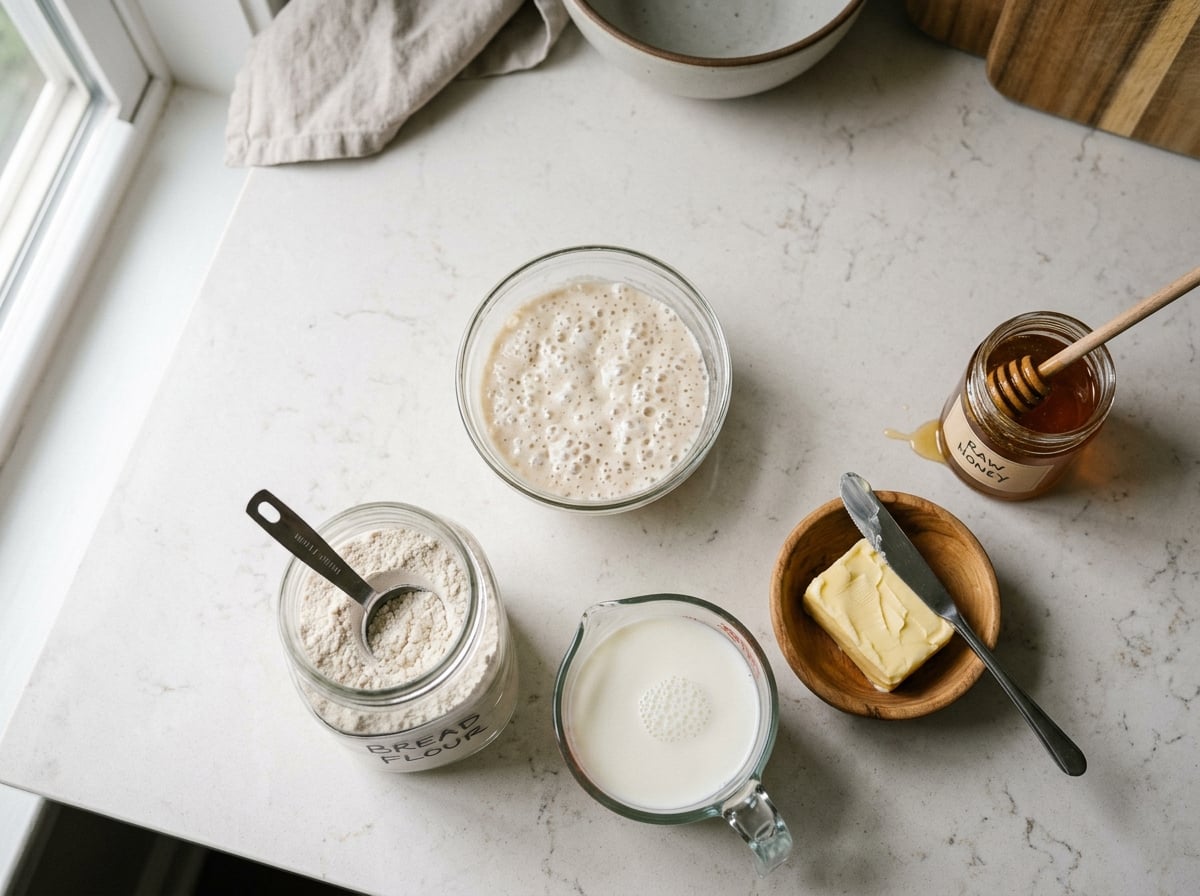
You won't need exotic ingredients, but the ratios are more crucial here than in a basic loaf.
- Active sourdough starter: Ensure your starter has been fed within 4-8 hours and is visibly domed or just past its peak activity. A sluggish starter will result in dense, gummy rolls, regardless of how well you knead the dough.
- Flour: Bread flour (11-13% protein) provides the ideal structure for a roll that remains soft. All-purpose flour can work but produces a slightly less chewy, more cake-like crumb, which can be quite pleasant for dinner rolls.
- Fat: Butter is standard, typically 3-6 tablespoons per batch of a dozen rolls. Some bakers use oil or a combination of butter and milk powder for extra softness. Fat coats gluten strands, contributing to a more tender crumb.
- Milk or water: Whole milk adds richness and lactose (sugar) which enhances browning. I use whole milk in most of my roll recipes now; water-only versions have a cleaner taste but brown less effectively.
- Egg: Optional, but one egg per dozen rolls adds structure, color, and a softer bite. Brioche-style sourdough rolls often incorporate two.
- Sweetener: One or two tablespoons of honey or sugar per batch feeds yeast activity and balances the tang from the starter. Omitting it will result in noticeably more sour-tasting rolls.
- Salt: Do not underestimate its importance—aim for 1.5-2% of the total flour weight. Too little salt leads to uneven fermentation and a bland taste.
Step-by-Step Recipe: Mixing, Kneading, and Shaping Sourdough Rolls
This recipe yields approximately 12 standard dinner rolls.
Ingredients: 500g bread flour, 150g active sourdough starter, 180g whole milk (warm, not hot), 1 egg, 50g softened butter, 30g honey, 9g salt.
- Mix the dough. Combine flour, milk, starter, egg, and honey. Allow the mixture to rest for 20-30 minutes (an autolyse-style pause). This step hydrates the flour and accelerates gluten development later.
- Add salt and butter. Knead in the salt, then gradually work in the softened butter, one tablespoon at a time. Incorporating fat slowly prevents the dough from becoming greasy and slack.
- Knead to windowpane stage. By hand, this typically takes 12-15 minutes; with a stand mixer, about 8 minutes on medium-low speed. The goal is a smooth, elastic dough that can stretch thin enough to allow light to pass through without tearing immediately.
- Bulk ferment. Cover the dough and let it rise at room temperature (72-75°F) for 4-6 hours, or until it has roughly doubled in volume. In a cooler kitchen, this process might extend to 8 hours; always prioritize volume over strict timing.
- Divide and shape. Gently turn the dough out onto a lightly floured surface, divide it into 12 equal pieces (each weighing approximately 65-70g), and shape each into a tight ball. Achieve this by cupping your palm over the dough and rolling it in small circles against the counter. Tight shaping is crucial for achieving a beautiful, domed rise in your sourdough rolls.
- Arrange and rest. Place the shaped rolls in a greased 9×13 pan or on a lined sheet pan, ensuring adequate space for expansion. Cover loosely and allow them to proof.
Mastering Proofing for a Light, Airy Sourdough Roll Texture
Proofing is a critical stage where many home bakers either rush or overdo it, with both errors impacting the final crumb. Room-temperature proofing typically takes 2-4 hours, depending on your starter's strength and kitchen temperature. The rolls should appear puffy, feel soft and marshmallow-like when gently poked, and the indentation from your finger should spring back slowly—not instantly (indicating underproofed) and not remain sunken (indicating overproofed).
Here are some tips that genuinely help:
- Rely on the poke test, not just the clock. Every sourdough starter behaves uniquely, so recipe timings are merely guidelines.
- A warm, humid environment accelerates proofing. An oven with just the light on, or a proofing box set to 78-80°F, can significantly reduce proofing time compared to a cool kitchen.
- Maintain shaping tension. Loosely shaped rolls will proof unevenly and tend to spread sideways rather than rising upwards.
- Cold overnight proofing is an option, but plan for it. Rolls proofed in the refrigerator for 8-12 hours develop more complex flavor and offer scheduling flexibility. Just remember to bring them close to room temperature for about 45-60 minutes before baking.
Overproofed sourdough rolls tend to collapse slightly when baked, resulting in a coarse, uneven crumb with large, irregular holes—not the desired outcome for a soft dinner roll. Underproofed rolls will bake up dense and tight, sometimes featuring a gray, gummy layer directly beneath the crust.
Baking Tips: Temperature, Timing, and Achieving a Golden Crust
Bake sourdough rolls hotter and faster than you would a large loaf. A temperature range of 375-400°F (190-205°C) for 18-22 minutes is ideal for most enriched sourdough roll recipes. Baking at a lower temperature risks drying out the crumb before the crust properly colors.
An egg wash (one egg beaten with a tablespoon of milk or water), brushed on just before baking, will give your rolls that classic glossy, deep golden top. For an even richer sheen, brush again halfway through baking. If you prefer a matte, rustic look, skip the egg wash and simply brush with melted butter after baking.
Internal temperature is the most reliable indicator of doneness. Pull the rolls when an instant-read thermometer inserted into the center of a roll reads 190-195°F (88-90°C). Relying solely on color can be misleading, especially with a milk- and egg-enriched dough that browns quickly.
Rotate the pan halfway through baking if your oven has hot spots, which is common in most home ovens. Crucially, resist the urge to open the oven door repeatedly during the first 12 minutes; a temperature drop at this stage can stall the rise you've worked hard to achieve.
Common Mistakes to Avoid for Perfect Sourdough Rolls
I’ve encountered every one of these pitfalls at least once, often more.
- Weak starter. If your starter hasn't at least doubled within 6-8 hours of feeding, it lacks the vigor required to adequately leaven an enriched dough, which inherently ferments slower than lean doughs.
- Excessive flour during shaping. Enriched dough is naturally sticky. Adding too much flour while shaping toughens the crumb and inhibits proper rise.
- Improper spacing. Rolls that touch each other during proofing and baking provide mutual support, resulting in that desirable pull-apart texture. Too much space, conversely, causes them to spread flat rather than rise upwards.
- Skipping the autolyse or rest period. While seemingly optional, this step genuinely reduces kneading time and significantly improves the final texture of your sourdough rolls.
- Rushing bulk fermentation in a cold kitchen. Under-fermented dough cannot be salvaged by a longer proof later; the foundational structure is already compromised.
- Opening the oven too early. A simple error, yet a frequent cause of sunken rolls.
Storing and Reheating Sourdough Rolls
Fresh sourdough rolls are at their peak on the day they are baked. However, with proper storage, they retain their quality well.
At room temperature, store them in an airtight bag or container for up to 2 days. The enriched dough, due to its fat content, stays soft longer than lean sourdough. After two days, staling will accelerate.
For longer preservation, freeze them. Wrap cooled rolls individually in plastic wrap, then place them in a freezer bag. They will keep well for up to 3 months. Thaw at room temperature for an hour, or reheat directly from frozen.
To reheat, wrap rolls loosely in foil and warm at 300°F (150°C) for 10-12 minutes. This method effectively restores their softness, far superior to microwaving, which tends to make enriched dough gummy. If time is short, 15-20 seconds in the microwave wrapped in a damp paper towel is a reasonable compromise.
Variations: Garlic Butter, Honey, Whole Wheat, or Discard-Based Rolls
Once you've mastered the basic recipe for sourdough rolls, it's easy to experiment with variations.
Garlic butter rolls: Brush shaped rolls with a mixture of melted butter, minced garlic, and chopped parsley before the final proof, and again immediately after baking. The garlic mellows considerably during baking, so don't be afraid to use a generous amount—3-4 cloves per batch is not excessive.
Honey sourdough rolls: Increase the honey to about 60g and brush the tops with a honey-butter glaze straight out of the oven. These rolls are sweeter and pair wonderfully with savory main courses like roast chicken.
Whole wheat sourdough rolls: Substitute up to 30% of the bread flour with whole wheat flour without major structural issues. If you go beyond this, add an extra 10-15g of milk, as whole wheat flour absorbs more liquid. Expect a slightly denser, nuttier roll—delicious in its own right, just different.
Discard-based rolls: If you're using sourdough discard (unfed starter) instead of active starter, you'll need to add a small amount of commercial yeast—about 1/4 teaspoon instant yeast per batch. This is because discard won't reliably leaven enriched dough on its own. It's an excellent, practical way to utilize excess starter without waste, and the rolls will still carry a lovely sourdough flavor note, even if the primary rise is yeast-driven.
FAQs About Making Sourdough Rolls at Home
Can I make sourdough rolls without discard or feeding my starter first? You can use discard, but for a reliable rise, you'll need to supplement with a little commercial yeast, as discard has less leavening power than an active, recently-fed starter.
Why are my sourdough rolls tough instead of soft? This is usually due to a combination of over-kneading and too little fat, or excessive flour added during shaping. Enriched dough should feel tacky, not dry.
How do I know when rolls are fully proofed? Use the poke test: gently press a finger into a roll; it should spring back slowly, leaving a slight indentation. Instant spring-back indicates underproofed, while no spring-back at all means overproofed.
Can I make the dough ahead and bake the next day? Yes—shape the sourdough rolls, place them in the pan, cover tightly, and refrigerate overnight. Allow them to sit at room temperature for approximately 45-60 minutes before baking to remove the chill.
Do sourdough rolls taste sour like sourdough bread? Generally, no. The enrichment, shorter fermentation, and added sweetener all work to mute the tang, resulting in a mild, slightly nutty flavor rather than a pronounced sour bite.
Leave a Reply